Define response actions for a suspicious process
As part of your remediation response to an attack, you can apply the following actions to suspicious processes:
- Stop a process (see below)
- Quarantine a process (see below)
- Roll back changes made by a process (see below)
- Add the process to a protection plan allowlist or blocklist (see Add a process, file or network to the protection plan blocklist or allowlist)
To stop a suspicious process
-
In the cyber kill chain, click the process node you want to remediate.
Windows critical processes or non-running processes cannot be stopped and are disabled in the cyber kill chain.
- In the displayed sidebar, click the Response Actions tab.
-
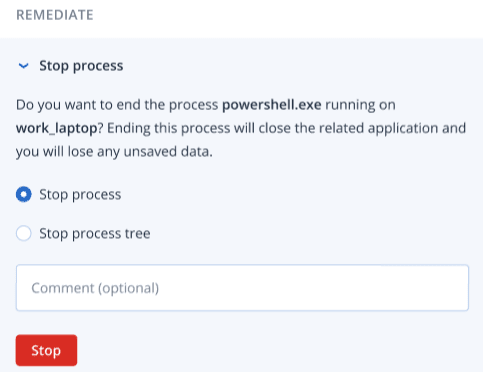
In the Remediate section, click Stop process.

-
Select one of the following:
- Stop process (stops the specific process)
- Stop process tree (stops the specific process and all child processes)
- [Optional] Add a comment. This comment is visible in the Activities tab (for a single node or the entire incident), and can help you (or your colleagues) recall why you took the action when you revisit the incident.
-
Click Stop.The process is stopped.
The related application is closed and any unsaved data will be lost.
This action can also be viewed in the Activities tabs of both the individual node and the entire incident. For more information, see Understand the actions taken to mitigate an incident.
To quarantine a suspicious process
-
In the cyber kill chain, click the process node you want to quarantine.
Windows critical processes cannot be quarantined and are disabled in the cyber kill chain.
- In the displayed sidebar, click the Response Actions tab.
-
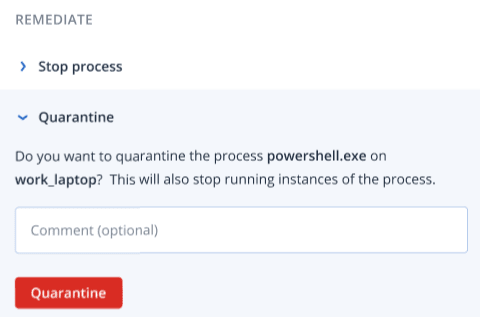
In the Remediate section, click Quarantine.

- [Optional] Add a comment. This comment is visible in the Activities tab (for a single node or the entire incident), and can help you (or your colleagues) recall why you took the action when you revisit the incident.
-
Click Quarantine.The process is stopped and then quarantined.
The process is added to and managed in the quarantine section available under antimalware protection.
This action can also be viewed in the Activities tabs of both the individual node and the entire incident. For more information, see Understand the actions taken to mitigate an incident.
To rollback changes
-
In the cyber kill chain, click the process node you want to rollback changes for.
This action is available for detection nodes (shown as red or yellow nodes) only.
- In the displayed sidebar, click the Response Actions tab.
-
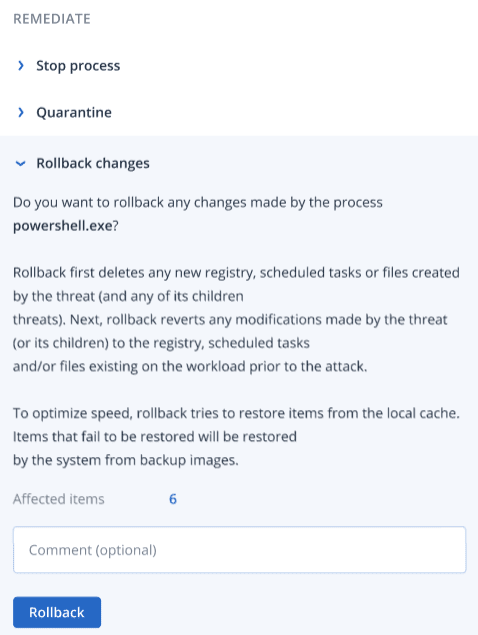
In the Remediate section, click Rollback changes.
 The rollback process recovers from items in the local cache only. Rollback from backup archives will be available in future releases.
 -
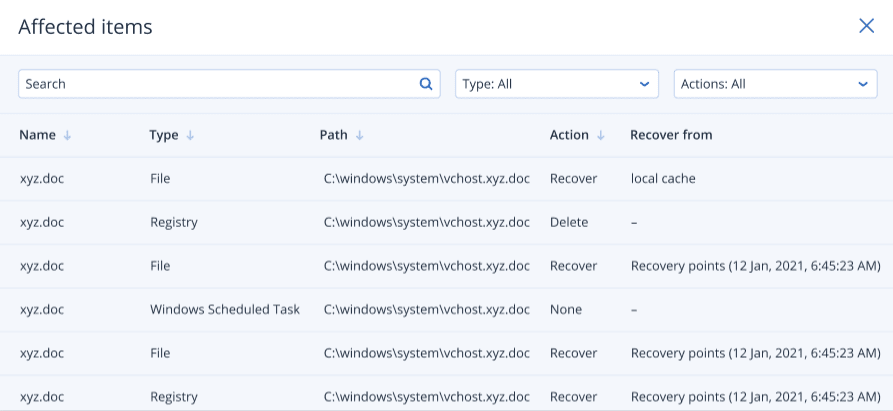
To view the items affected by the rollback changes, click the Affected items link. The displayed dialog shows all items (files, registry, scheduled tasks) that the rollback will revert and with what action (Delete, Recover, or None). In addition, you can see whether the restored items will be recovered from the local cache or backup recovery points.

- [Optional] Add a comment. This comment is visible in the Activities tab (for a single node or the entire incident), and can help you (or your colleagues) recall why you took the action when you revisit the incident.
-
Click Rollback. The rollback functionality reverts any registry, file or scheduled task changes made by the process in the following steps:
- Any new entries (registry, scheduled tasks, files) created by the threat (and its child threats) are deleted.
- Any modifications that the threat (and its child threats) made to the registry, scheduled tasks and/or files existing on the workload prior to the attack are reverted.
- Rollback tries to recover items from the local cache. For items that cannot be recovered, EDR will automatically recover them from clean backup images.
The rollback action can also be viewed in the Activities tabs of both the individual node and the entire incident. For more information, see Understand the actions taken to mitigate an incident.