Forensic data
Viruses, malware, and ransomware can carry out malicious activities, such as stealing or changing data. These activities may need to be investigated, which is possible only if digital evidence is provided. However, pieces of digital evidence, such as files or activity traces, may be deleted or the machine on which the malicious activity happened may become unavailable.
Backups with forensic data allow investigators to analyze disk areas that are not usually included in a regular disk backup. The Forensic data backup option allows you to collect the following pieces of digital evidence that can be used in forensic investigations: snapshots of unused disk space, memory dumps, and snapshots of running processes.
Backups with forensic data are automatically notarized.
The Forensic data option is available only for entire machine backups of Windows machines that run the following operating systems:
- Windows 8.1, Windows 10
- Windows Server 2012 R2 – Windows Server 2019
Backups with forensic data are not available for the following machines:
- Machines that are connected to your network through VPN and do not have direct access to the Internet
- Machines with disks that are encrypted by BitLocker
You cannot modify the forensic data settings after you apply a protection plan with enabled Backup module to a machine. To use different forensic data settings, create a new protection plan.
You can store backups with forensic data in the following locations:
- Cloud storage
-
Local folder
The local folder location is supported only for external hard disks connected via USB.Local dynamic disks are not supported as a location for backups with forensic data.
- Network folder
Forensic backup process
The system performs the following during a forensic backup process:
- Collects raw memory dump and the list of running processes.
- Automatically reboots a machine into the bootable media.
- Creates the backup that includes both the occupied and unallocated space.
- Notarizes the backed-up disks.
- Reboots into the live operating system and continues plan execution (for example, replication, retention, validation and other).
To configure forensic data collection
- In the service console, go to Devices > All devices. Alternatively, the protection plan can be created from the Plans tab.
- Select the device and click Protect.
- In the protection plan, enable the Backup module.
- In What to back up, select Entire machine.
- In Backup options, click Change.
- Find the Forensic data option.
-
Enable Collect forensic data. The system will automatically collect a memory dump and create a snapshot of running processes.
Full memory dump may contain sensitive data such as passwords.
- Specify the location.
- Click Run Now to perform a backup with forensic data right away or wait until the backup is created according to the schedule.
- Go to Dashboard > Activities, verify that the backup with forensic data was successfully created.
As a result, backups will include forensic data and you will be able to get them and analyze. Backups with forensic data are marked and can be filtered among other backups in Backup storage > Locations by using the Only with forensic data option.
How to get forensic data from a backup?
- In the service console, go to Backup storage, select the location with backups that include forensic data.
- Select the backup with forensic data and click Show backups.
-
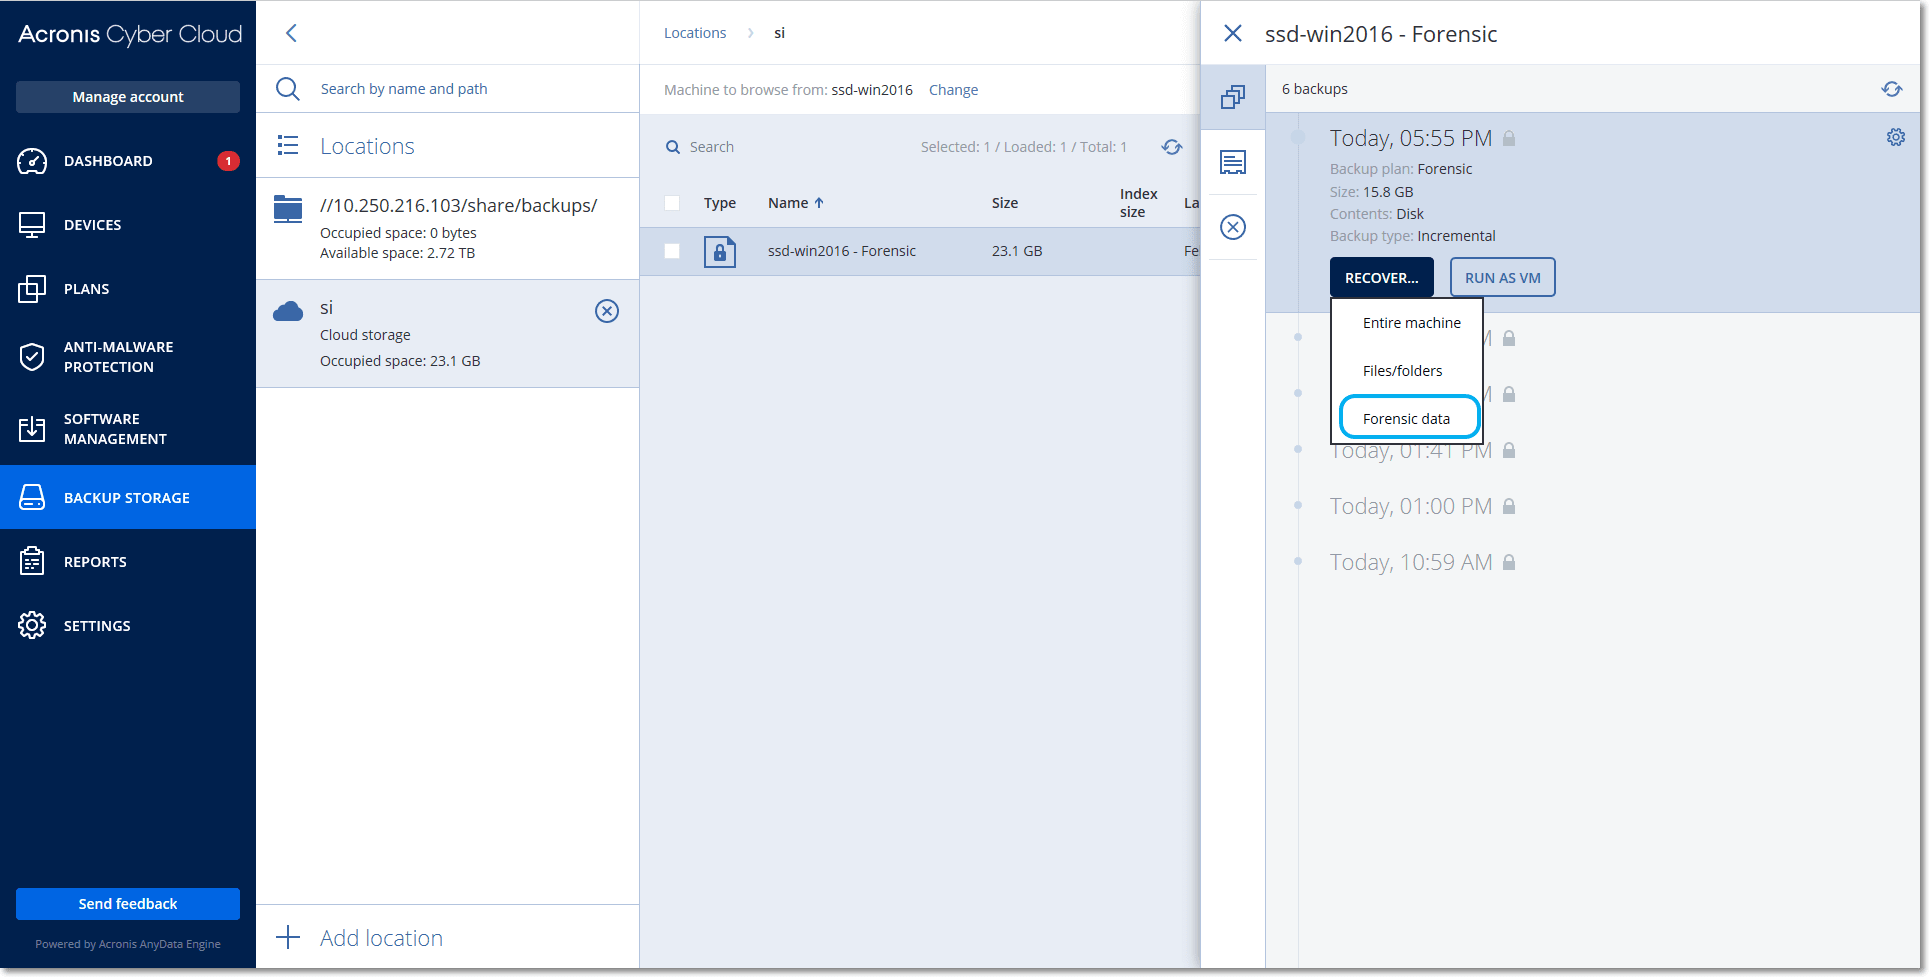
Click Recover for the backup with forensic data.
-
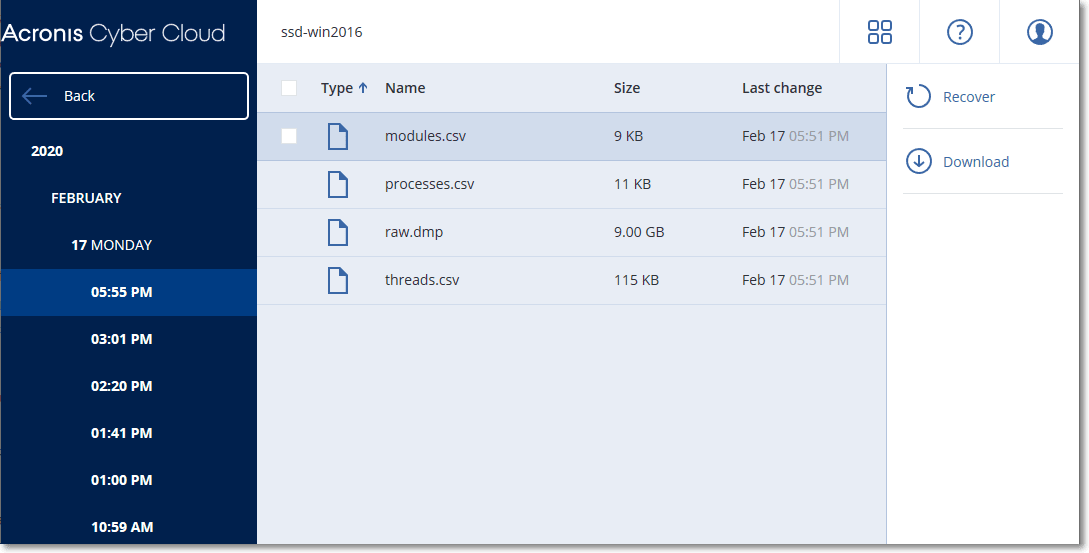
To get only the forensic data, click Forensic data.

The system will show a folder with forensic data. Select a memory dump file or any other forensic file and click Download.

- To recover a full forensic backup, click Entire machine. The system will recover the backup without the boot mode. Thus, it will be possible to check that the disk was not changed.
-
You can use the provided memory dump with several of third-party forensic software, for example, use Volatility Framework at https://www.volatilityfoundation.org/ for further memory analysis.